How to Create a Marigold Planter Box for your Patio

Step by Step Instructions On How To Plant Your Marigolds

1. Preparing the soil

Pour the potting soil into the wheelbarrow and mix in enough water to moisten (not soaking wet).


photograph courtesty of www.rona.ca

 4. Fill your planter box up to one inch below the top of the container with the moist potting soil mix.

5. Tap the box lightly up and down on the ground to firm the soil.


 photograph courtesty of www.rona.ca

 8. Place the plants into these holes to the proper depth (see depth chart to the right).

photograph courtesy of www.ladybugworldpress.com

 2. Choose your planter box location and move the materials there. Remember: Marigolds like lots of direct sunlight so pick an area that receives six hours of sun every day (at least).

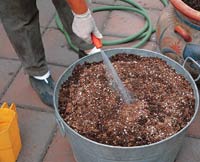
3. Put the 6 cups of pea gravel (to line the bottom) in your planter box

 photograph courtesty of www.rona.ca

 6. Remove the Marigold plants from their small pots and cut three incisions to loosen the root balls (see picture). This will stimulate growth.

7Make three holes in the soil of your planter approximately 15 cm apart. 

 photograph courtesty of www.rona.ca

9. Move the soil around the plants and lightly pack down.

10. Backfill the planter with soil as necessary pressing down to remove any air pockets.

11.Water the entire planter box with the fertilizer and water mixture.

 photograph courtesty of www.rona.ca